

Sunny skies might sound like a photographer’s best friend, but too much sun can be tricky, especially during outdoor elopement sessions in Las Vegas. Next to the heat, the top challenge in summer is harsh sunlight. It creates hard shadows, causes people to squint, and makes photo editing more difficult. And during August, strong sunlight burns down for most of the day, bouncing off buildings and washing out key details in your photos if you’re not careful.
That doesn’t mean taking beautiful, natural-looking photos isn’t possible. You just need a solid plan and a few adjustments to work with the light instead of fighting it. When done right, even the brightest sunlight can bring out stunning highlights and warmth in your photos. Here’s how we help make sure the light works for, not against, you during your Las Vegas photo session.
Timing Is Everything
Choosing the right time of day truly makes all the difference. The sun behaves very differently at 8 a.m. than it does at 2 p.m., especially in late summer. During midday, it’s directly overhead, casting strong shadows across your face and creating those unflattering highlights that draw attention away from the emotion of the moment.
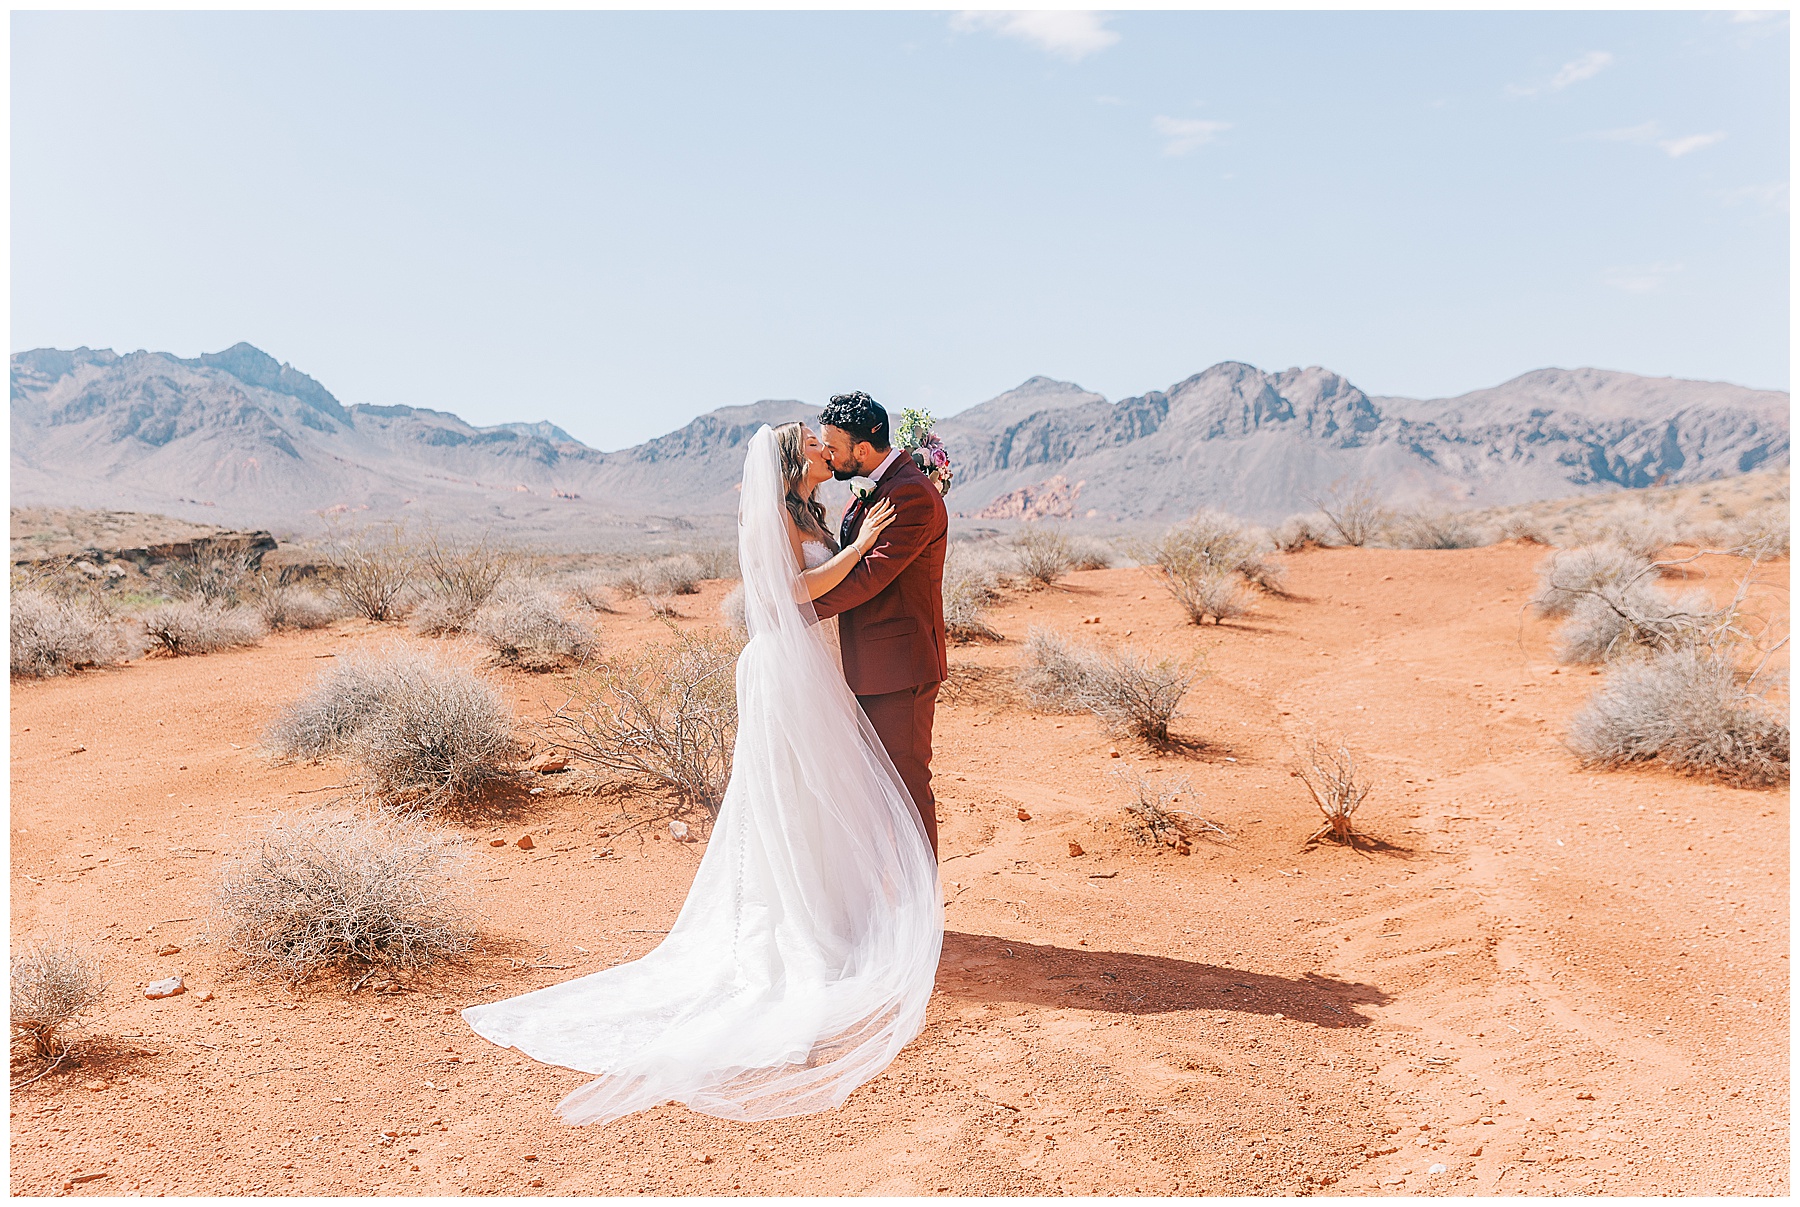
For outdoor elopements in Las Vegas, the sweet spots are usually right after sunrise and right before sunset. These time windows offer what’s known as soft, directional light. That means less squinting, fewer shadows, and a golden glow that naturally flatters skin tones. It also opens up more backdrop options without worrying about hot spots or harsh lines across your clothes or face.
Here’s when to consider scheduling your session:
1. Morning Light: Between 6 a.m. and 8 a.m., depending on the time of year. Light is cooler in tone, shadows are longer but softer, and there’s usually less foot traffic around town.
2. Golden Hour (Late Afternoon): Typically one hour before sunset. Lighting is warm and dreamy, great for emotional portraits and silhouettes.
3. Blue Hour (Just After Sunset): Soft and peaceful, perfect for wrapping up your session. You’ll still get light, but it’s even and moody.
Think about how you want the mood to feel—warm and glowing? Cool and clean? Matching the time of day with your vibe helps everything fall into place naturally.
Make The Most Of Shade
Las Vegas isn’t known for its giant trees, but that doesn’t mean shade is hard to find. In fact, some of the best light happens when you’re standing just on the edge between sun and shade. When used right, these spaces offer relief from the direct sunlight and give us more control over how the light hits your faces and outfits.
Working with shade isn’t just about cooling off. It helps soften harsh lines and prevents blown-out highlights that we can’t fix later. Some of the best shaded areas in the city include:
– The sides of downtown buildings, especially ones with layered architecture and nooks
– Walkways or alleys that stay shaded for most of the day
– Arched doorways and entranceways, which add shape and softness all at once
– Areas with even partial tree coverage near parks or desert spots on the city’s edge
Even if an exact location doesn’t offer full shade, we can usually find angles that block the light just enough to get the job done. For example, shooting with the sun behind a tall structure like the Neon Museum’s walls creates beautiful backlighting without harsh glare. You still get that desert feel while keeping the light even and flattering.
Sometimes, we don’t need full-blown shade. Just stepping a few feet to the side of a sunlit patch can eliminate the strong shadows across your face and keep the lighting softer. It’s those tiny adjustments that make all the difference when the sun’s working overtime.
Use Reflectors And Diffusers
Sometimes when shooting outdoors in Las Vegas, even with good timing and smart framing, the sun still creates tough lighting conditions. That’s where reflectors and diffusers come in. These tools help even out the brightness without losing the natural feel of the setting.
A diffuser softens the sunlight before it hits the subject. It’s basically a thin screen that filters the light and smooths out harsh shadows. This is especially helpful if you’re standing in an area with no access to shade. Reflectors work the opposite way. They bounce existing light back onto your face, filling in dark spots caused by direct overhead sun or shadows falling in odd places.
When the sun’s directly above, a reflector placed just out of the frame can brighten up your face and eyes while keeping you lit in a natural way. On windy days, using this technique can be tricky, so we tend to hold off unless conditions are calm enough to manage it safely and consistently.
Using both tools lets us control where light is going and how it appears in the photo, instead of leaving it up to chance. This is especially helpful in tricky spots like wide-open desert areas or places with bright concrete that reflects the light upward.
A common example is photographing a couple near Fremont Street, where sun bounces off the sidewalk and walls. A diffuser cuts down glare, and a reflector adds just enough light to bring out softer textures in your face or clothes without blowing anything out.
It’s not about changing the light completely. It’s about shaping it just enough to get a clean, gentle result. These adjustments are subtle but noticeable when you see the final image.
Choose The Right Backdrop
Where you choose to stand plays a big part in how sunlight affects your photos. Even within the same block, stepping a few feet in one direction can totally shift the lighting. The backdrop you choose isn’t just part of the composition. It also shapes how the light behaves in the photo.
Bright, reflective backdrops like white walls or light pavements will bounce light, often creating stronger highlights. That can give you an edgy, high-contrast look, but it’s usually better to keep it balanced. Earth-toned walls, painted murals, or aged bricks offer a more forgiving surface when shooting under strong direct sunlight. They absorb some light instead of bouncing it all over the place.
When scouting locations around Las Vegas, we look for spaces that offer contrast and character but won’t fight the lighting too much. That might mean textured stone, dark stucco, weathered wood, or even shaded alleyways with moody tones. These kinds of settings avoid that washed-out or blinding look you sometimes get with ultra-flat surfaces in the sun.
Here are a few things that make a backdrop more sun-friendly:
– Neutral or darker tones that absorb light and reduce bounce
– Textures that work well with contrast, such as stone or brick
– Elements that break up the space, like doors, arches, or railings
– Slight shade close to the wall that softens the light on your body or face
Changing your backdrop is one of the easiest ways to adjust your lighting without having to move to a whole new spot. Thoughtful background choices can really help turn a hard light situation into something usable and even beautiful.
Trust Your Photographer’s Eye
When it comes to controlling harsh sunlight, technology helps, but experience makes the biggest difference. A seasoned photographer understands how to read light, adjust quickly, and make small moves that shift an entire frame from harsh to soft.
That might mean rescanning a scene every few minutes as the light changes or recognizing that a nearby shaded doorway is better than the open square you had in mind. And when the sun’s hitting hard with no clouds in sight, these choices matter more than anything else. While it’s fine to go in with a rough plan, outdoor lighting is always changing, and you want someone who can adjust just as fast.
There’s also gear knowledge to factor in. Every camera and lens reacts differently to light. Some overexpose skin tones or flare quickly at certain angles. Knowing how to work with that, which direction to shoot from, and how to keep the light flattering comes with experience.
More than anything else, it’s about teamwork. You should feel comfortable and relaxed while your photographer handles the tough stuff. Directing where you stand, shifting feet just slightly, or even asking you to angle your face differently can all happen in real time during the shoot, shaped by the actual lighting.
Why Harsh Light Doesn’t Have to Ruin Your Day
Harsh sunlight doesn’t have to ruin your photo session in Las Vegas. The desert light has character, and yes, it can be strong, but with the right approach, it adds depth and warmth that you wouldn’t get in a softer climate. You can’t always predict the perfect lighting, but making smart choices about time, place, and positioning makes a huge impact.
Trust the process, stay open to switching things up on the fly, and lean into what the desert gives you. Even the brightest days have soft moments. You’ve just got to know where to find them. Working with the sun instead of against it helps keep your elopement photos real, vibrant, and full of life. And that’s what matters most.
Ready to turn the harsh Las Vegas sun into your perfect photo backdrop? Look no further than our accomplished team at Siga Gubista Photography to capture those unforgettable moments. As an experienced elopement photographer in Las Vegas, we’re committed to transforming every ray of light into a stunning glow in your photos. Let us help you celebrate your special day with vibrant and naturally beautiful imagery that you will cherish forever.


add a comment
+ COMMENTS